What Can a Teapot Teach You About Rendering?
Learn how to use VRay Proxy to import geometry from an external mesh through this teapot example in Vray 3.2 for 3ds Max in this free tutorial.

Learn about creating a daylight system in Vray 3.2 for 3ds Max in this free tutorial.

A free tutorial from the Black Spectacles course 3D Rendering with Vray 3.2 for 3ds Max.
In this Black Spectacles FREE tutorial, you will learn how to create a daylight system which uses light in a system that mimics the geographically correct angle and movement of the sun in Vray. This tutorial is part of the Black Spectacles course on 3D Rendering with Vray 3.2 for 3ds Max in which you will learn how to bring a 3d model into Vray, render it out, and touch it up in Photoshop to give your final image a professional finesse.
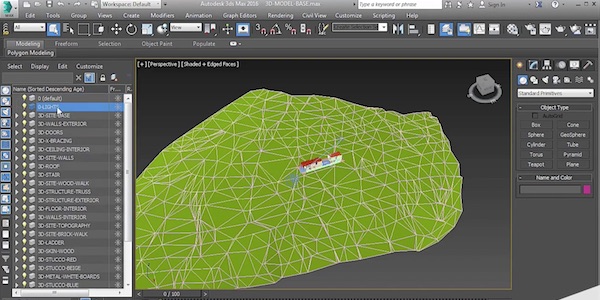
Now that you have your render settings and Max settings in place, it’s time to set up the lighting for the scene.
It’s helpful to keep your lights in their own layer in Max. To do that, go to the layer manager on the left-hand side and click on the “Create New Layer” icon. Name the layer “0-Lights.”
Putting the “0” in front of it brings it to the top of the list so it’s easy to find. You can see in the layer manager, that everything that is geometry has a “3D” in front of it. And everything that is supporting of the scene has a different character in front of it. This helps to keep things nice and organized for you. Now, make sure the “Lights” layer is your layer is current,
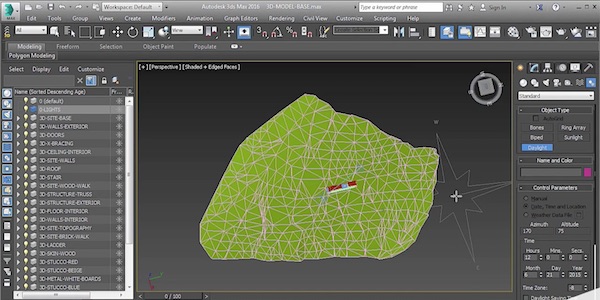
There are multiple ways of doing ambient and global illumination lighting in Vray. The one we will do now is the Daylight System. The Daylight System has been around Max for a long time, but was never integrated with Vray up until Vray 2.0. It’s a really easy way to set up a Vray Sun and Sky System within Max. What you will be creating is a physical, simulated sun that will be rendering your scene.
To do this, go to the menu on the right-hand side, and click the “Create” tab, which is the first tab with the little sun icon. Within that tab, the 3rd icon from the left is the “Lights” icon. Click on that and select “Vray” from the dropdown menu. This is where you access all your Vray lights. You can see here there’s a “VRaySun.” If you were to click on that and insert it, it will only give you that particular Vray light, but you’d have to manually place it.

One of the nice things with the daylight system is that you can tie it to location and a time of day, to make it a little more realistic, in terms of getting actual results if you’re trying to match shadows from a photograph.
So go to the “Create” tab at the top and go all the way down to “Systems,” from there, select “Daylight System.” When you click on Daylight System, you can see the “Lights” section in the right-hand menu has now switched to “Daylight.” You can also get to this section by selecting the “Systems” icon within the “Create” tab. So there’s a lot of redundancies within this right-hand menu and the top menu, you can get there from either menu, but it’s the same thing.

After you’ve created the daylight system, you can see in the bottom left hand corner, it says “Click and Drag to Create a Sun System.”
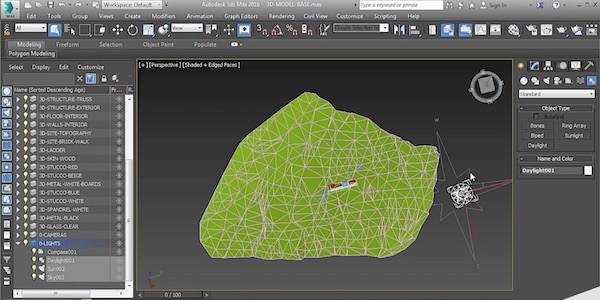
It’s best to place it where it is easy to see. Left-click where you want to place it, and then drag your cursor slightly to get that compass on the ground. When you let go of the click, a box pops up asking if you want to create a Mental Ray Sky. We are using a Vray sky with Vray lights, so in this case, you can say “No.”
And then it prompts you to set the sunlight icon itself. Just drag it a little bit and just right-click, and you’re done. So when you orbit, you can see your daylight system is comprised of a compass that will set the north orientation, and you can adjust that, and then there’s the actual sunlight which is up in the sky.
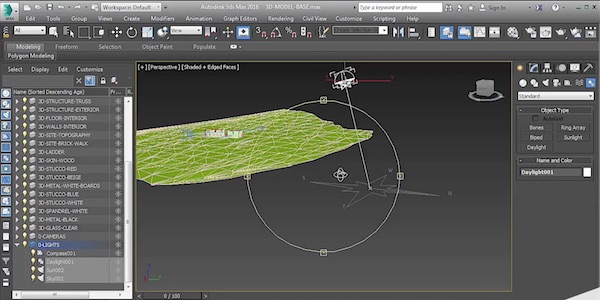
One of the things to keep in mind here is the location of the system, in relationship to your scene, is irrelevant. It does not matter if it’s way off in the distance or if it’s on top of your model. Put it where you can best see it. Don’t worry about the sun icon being too far away from your model or too close to your model. It has no impact on the lighting solution. It’s purely graphical.
View the video for this tutorial here:
Learn how to use VRay Proxy to import geometry from an external mesh through this teapot example in Vray 3.2 for 3ds Max in this free tutorial.
Learn about applying the Vray Toon Effect in Vray 3.2 for 3ds Max in this free Black Spectacles tutorial.
Learn about setting the Camera and Environment Options in Rhino 5 for Vray 3.2 in this free tutorial.